Tuesday, September 18, 2012

Infrared (IR) Photography

Infrared Photography is another one of my absolute favorite genres of photography.  The deep contrasts and surreal scenes that an IR filter can provide are nothing short of extraordinary!  Mainly used for black and white shots, an IR photo is perfect for Landscapes or Cityscapes - Where photos that have a ton of shadows and variations of light are your scene in the shot.  However with some basic photo software you can even convert the color version of your IR file into what's called a "False Color" IR photo.  FC IR's give you deep blue skies, and bright white foliage that looks as if It's been hit by an Ice storm the night before.

To shoot IR you need a few things first -

1. An SLR camera with an image sensor that does NOT block out IR light.  All camera sensors are designed to block out IR light, but the older SLRs don't block nearly as much as more modern cameras do.  For example my old Nikon D40 is perfect for shooting Infared.  My Nikon D7000 ... not so much.

2. An Infrared filter - the one I was sold on and use pretty much exclusively is an R72 Filter. A few different companies make an R72 filter - Hoya's R72 is a top of the line filter with great reviews and a top shelf price to go along with it.  Bower is another brand that makes and R72 filter that is about half the price of the Hoya.  Of course me being a penny pincher - I took the risk and went with the off brand.  The Bower filter for me works flawlessly.  It takes great images and has time and time again given me the results I was looking for.


3. Tripod!  One of the first things I noticed about the IR filter is that it is pretty much black.  You can barely see any visible light through this filter (because it only lets IR light through) meaning you need to use much longer shutter speeds to get a proper exposure.  On a bright day in the middle of the afternoon I typically shoot f/3.5, ISO 400 and still have to use a 1/4 second shutter speed!  A tripod is definitely helpful but it is still possible to hand hold a crisp IR shot if you position yourself right.

The first thing I noticed when I put the filter on is how there is virtually no visible light coming through this filter... it looks black, and it was near impossible to compose a photograph through it simply because you can not see what you are shooting!  Also the lack of light means you need to keep your shutter open for quite a bit longer than a normal daytime exposure.  I was finding that at an ISO of 400 and an F-stop of 3.5 was leaving me anywhere from a 1/8s to a 2 second exposure!  

Now, as I was saying earlier you can take amazing black and white images in Infrared and with a little software, you can create surreal color images!  Black and whites are easiest as you can take the photo all in camera either by setting your camera to B&W or by converting it in camera afterwards.  


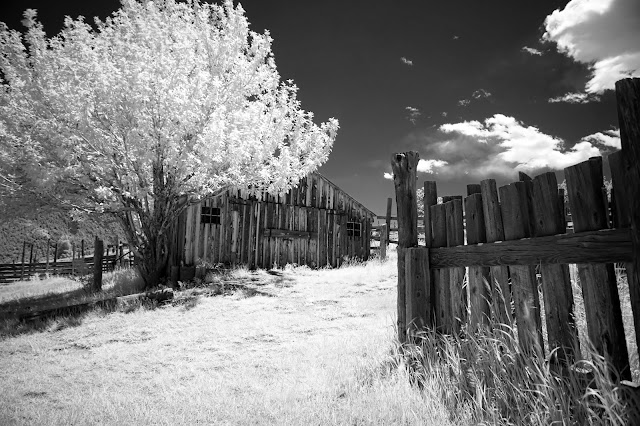
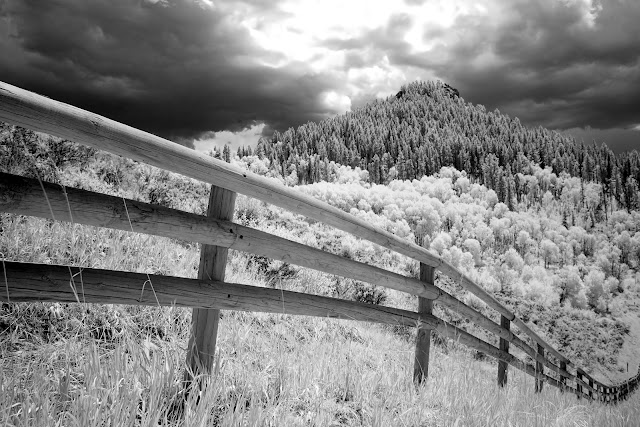
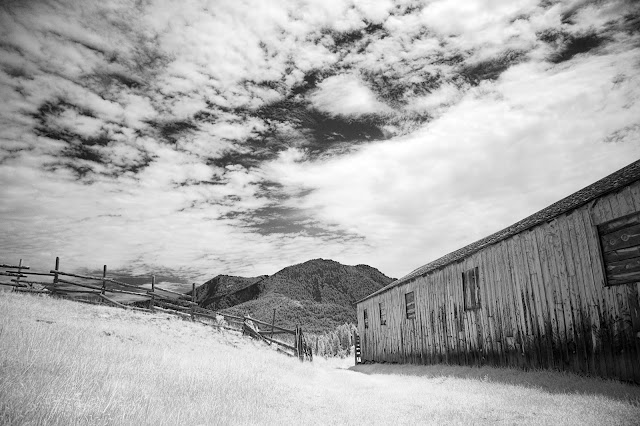
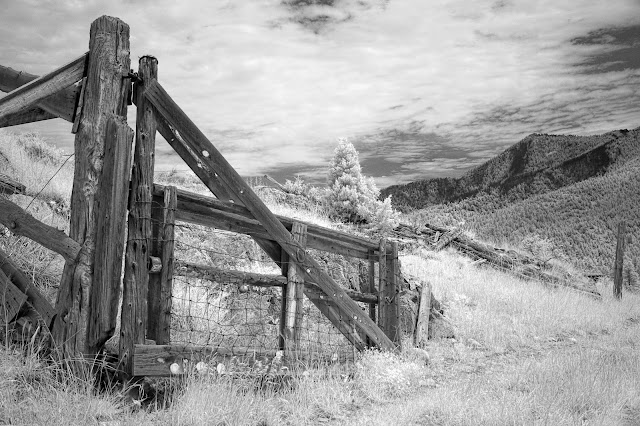
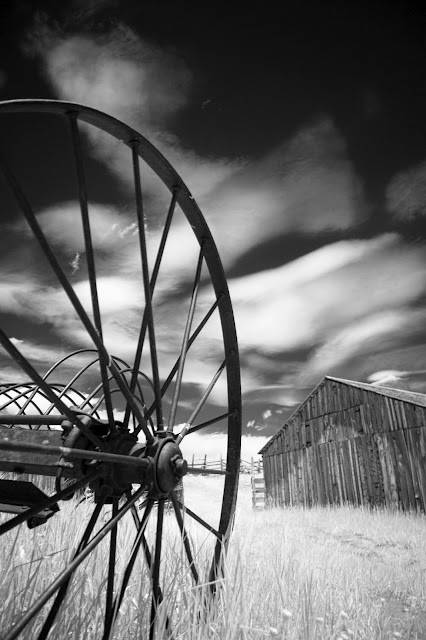
As you can see an infrared photo in Black and White has amazing results.  The sky becomes almost black, contrasting the frost white foliage and clouds. Shadows also pop, giving everything an extreme depth to it.  The longer shutter speed though means shooting on a still day is Ideal. The very last photo in the series of B&W's you can see how just a little wind will give trees and anything else moving motion blur quite easily.
(Which can add to a photograph greatly if that's what your intention was!)

False color shots are just as easy, they just requite some post processing.  Because of the processing I recommend that you shoot your files in RAW, as you will need to manipulate the white balance later.


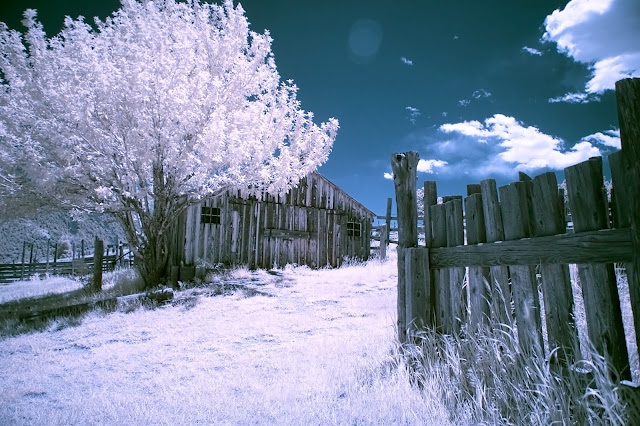
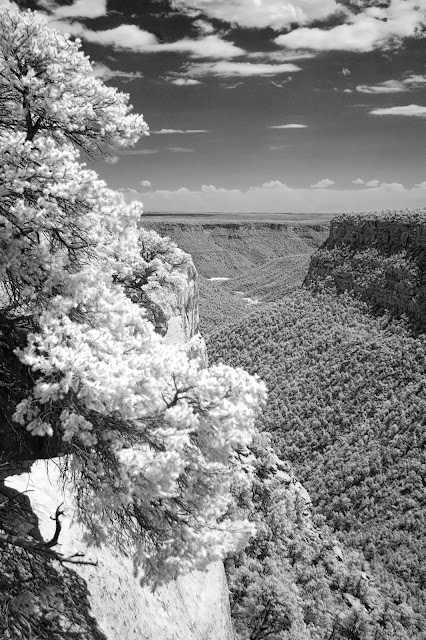
This last image I also did a color version as well as a B&W. 

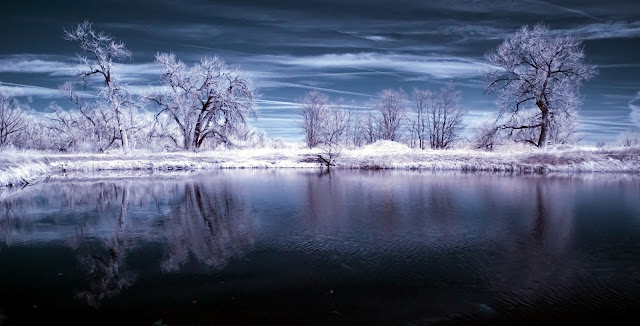
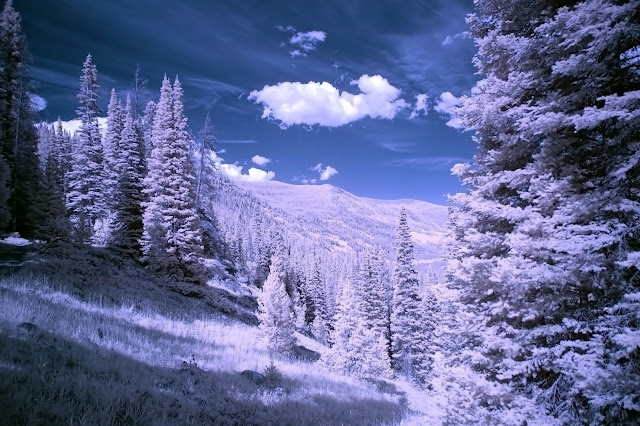
As you can see the color images have a surreal feeling to them. The sky is dark dark blue, almost black even! while the trees are ghostly white with hues of red and purple (sometimes even yellow depending on how you decide to process the images) 

To get a false color image it is quite simple.  You just need to follow these steps. 

1. Open your RAW file into your photo editing software (I just have Photoshop CS3 it works great!) 

2. Set your white balance - Since the foliage in the shot is naturally bright white, you want to get your white 
balance eye drop tool and click on a leaf or grass or piece of foliage in the shot.

3. Channel Swap! - basically your are swapping the color red in the photograph for the color blue.  
When you bring up the channel swap menu, you will see a Red Channel a Green Channel and a Blue channel. 

The red channel has it's values set to 100% Red and 0% Green and blue.  
Change the values to 0% red and 100% blue.  
Next go to the Blue Channel and do the exact opposite (100% red and 0% blue) 

 Once you have done the channel swap, and you have a dark blue sky, your final step is to adjust the color levels.  Auto levels work well in most instances, but feel free to play around with the levels manually.  


Sunday, September 16, 2012

Walker Ranch at Night

This is an additional post to yesterdays post - I got permission to go up to Walker Ranch after dark during the New Moon to shoot the ranch in the absolute darkness of a new moon sky.  The view of the milky way from here is incredible!


All of these photos and more can be viewd larger and in high quality at www.lohrphoto.com !


Saturday, September 15, 2012

Walker Ranch

This post isn't going to be super wordy like my last couple.  Right now I am working at a place here in Boulder County called Walker Ranch - And while I personally don't know much about the history of the place, I know it is a very historically rich gem right here in Boulder County. Over the last month I have been exploring the barns, buildings, and property with my camera.  Enjoy!

- Outsides - 


- Insides -


 The critters of Walker Ranch 


Saturday, September 1, 2012

After Dark

By far one of my favorite genres of photography is the night time landscape.  Since I was a kid, I have had a fascination with space - the stars, the planets, the galaxies... everything about the night sky has always left me staring up into the darkness letting my imagination run wild for hours on end.

A short while after I got into photography I realized that it was possible to capture images of the night sky that resemble shots I thought only were only possible if you had a telescope and camera designed by NASA!  I had no idea that a regular ol' SLR and a lens with a super wide aperture could do the same job. I needed to try it! I had the SLR, all I needed was the lens.

After a little research, I found a few different lenses that would capture the results I was after, but the one that sang above all the others was the Nikon Fixed 35mm f/1.8.  On a spur of the moment purchase (All of my camera equipment is spur of the moment... If I think too much about how much money I'm spending I wont ever get it) I went to Mike's Camera in boulder and bought it.  Now what makes this lens the perfect starter lens for doing star scape photography is not only the crisp image you get, and the super wide aperture of f/1.8 but also the price.  Brand new I've found this lens online from trusted retailer's sites for only $160.  At a specialty camera store like Mike's Camera expect to pay a little more however... Just think of the extra money though as the price to pay for instant gratification - no waiting for that pesky shipping.

So I paid extra for some instant gratification and went straight from the store up to Jones Pass (near Berthoud Pass) to find a sky free of light pollution.

This is one of the first shots that the new lens allowed me to capture -


I used some trees to silhouette the foreground, as if to let you know that this photo was still taken from earth, and not from some crazy NASA space telescope.  For this shot I bumped up my ISO to 1000, and used the handy new lens at an f-stop of 1.8 for an 8 second exposure.  The white balance I set to roughly 3500k giving the sky a purple feel to it.  The orange haze in the shot is from clouds sailing high overhead and catching the light pollution (wasn't far enough away apparently) from Denver.

The hardest part of shooting the stars I realized right away was trying to figure out how to get the stars in focus.  My first few shots rendered a colorful blur of the cosmos resembling a blurry bowl of Trix cereal.  I soon came to figure out that if  you use the D7000's live view (the LCD screen) You can zoom in on a single star and adjust your focus until the star is crisp and twinkly! Once you have your focus set, you are good to shoot!

My next star adventure led me out in late fall up Hwy 7 through Lyons, CO and up to Brainard Lake.  Stopping first at Hall Ranch I was able to capture 3 shots of Top Hat Mountain, which I later stitched together for the full photo. 


 Continuing up the road to Brainard Lake, I found an amazing scene!  Light pollution from the front range actually lit up the mountains while the completely dark western night sky provided a backdrop of stars like I have never seen before.  The below shot is also a panorama of 4 shots stitched together from right to left.  


Below - With a 1.8 f-stop you can even get a crisp shot of the Milky Way.  This photo was taken near Steamboat Springs, CO.  The foreground is Young's Peak, and the backdrop is our night view of our very own home galaxy.  Makes you feel pretty special knowing this galaxy is one of hundreds of billions out there!  


Getting a foreground shot with a starscape in the background is challenging, but creates an amazing image.  Use what ever lights you have, be it a flashlight, a campfire, or the light of a full moon/light pollution to light up our world under the night sky.  The contrast between the terrestrial and the cosmic brings to life an image straight out of science fiction. 


Below is another shot from the campfire.  The light on the trees is from the campfire behind me.  The blue sky and the dark red on the normally white aspens is the result of a very cool white balance right around 2500k. 


Finally my most recent star shot from last weekend when I was trying out the new lens. The landscape is lit by the light of a nearly full moon. Patchy cloud cover and an orange hue from the distant cities of the front range create the sky of the terrestrial, all while stars from the cosmic come twinkling through. 
Lastly, as I do with all my great photo adventures, I had to hop in my own shot - Just to prove I was there :) 


I will cover Star Trails in another blog in the future.  I am just beginning to experiment with star trails and don't know enough to write an informative blog on the subject. 

As always, please check out these images and many others on my main gallery site www.lohrphoto.com 

- Mike