Shooting under the full moon is just as easy if not easier than shooting a night sky under a new moon. It's easier to pick your scene, It's easier to focus on your foreground subjects, It's easier to light your subjects! The only downfall about shooting nighttime landscapes under a full moon is you don't get nearly as many stars in the sky.
The detail you get in the landscape itself however is well worth the sacrifice of a few stars in the sky.
To start, you'll need a couple of things -
1. A camera (an SLR or DSLR works best) that allows you to adjust things like your shutter speed, ISO and F/stop
2. A Tripod
3. A good location
Simple Enough Right?!
Totally!
Next -
After you've set up at your location you want to bump up your ISO. This will allow you to have a bright and vivid photograph without having to use a very long shutter speed. Using a long shutter speed can cause stars to streak, and allows more time/chance for the camera to be bumped or moved which will blur and ruin your shot (unless that's what you're going for because you're all creative like that and you have some brilliant motion blur technique that you're testing out!! Which would be awesome... Hmmm ... Maybe I'll have to try that one!) Anyway, Bump up your ISO. On full moon nights, I like to shoot around ISO 800. You can bump it up even higher for a faster shutter speed but just remember, the higher your ISO the grainier your photo will be, so don't over do it!
Okay - You've found your location, you set your ISO next you want to set your F/Stop. Night time shots typically require the lowest aperture you can achieve on your lens. I have a 35mm F/1.8 lens that I shoot with normally on starry nights, but under a full moon even if you can get down to a F/3.5 (which most lenses are capable of) you should be sitting pretty. There is enough ambient light from the moon itself to allow for a smaller aperture. So if you can set your F/Stop down lower than 3.5 then do it. But if you have a lens capable of wider apertures then 2.8 is usually a good number to shoot at under the full moon.
Next - Shutter Speed!! If you shoot with a DSLR, you can preview your files right after you shoot them. Do a test shot. If it's too dark, then use a slower shutter speed. If it's too bright a faster shutter speed! Darker/Slower - Brighter/Faster ... You get the idea. Typically your light meter I've found is not a reliable way to gauge what shutter speed to use at night... Test shots are the only thing I've found to hone in perfectly on that sweet blend of settings.
Now It's Time to Get CREATIVE!!!
Following these steps will get you the basics of shooting under a full moon - Now it's time to get creative!!
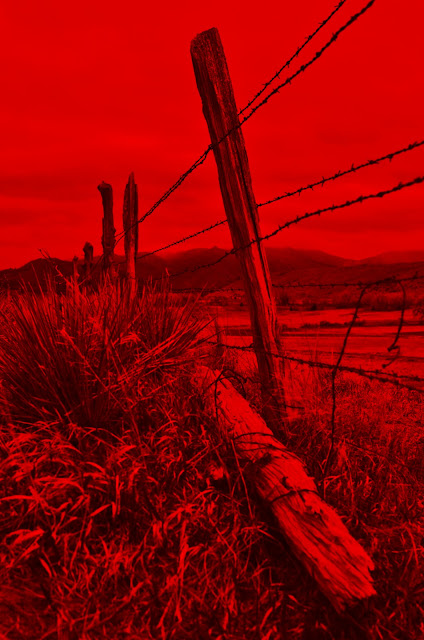
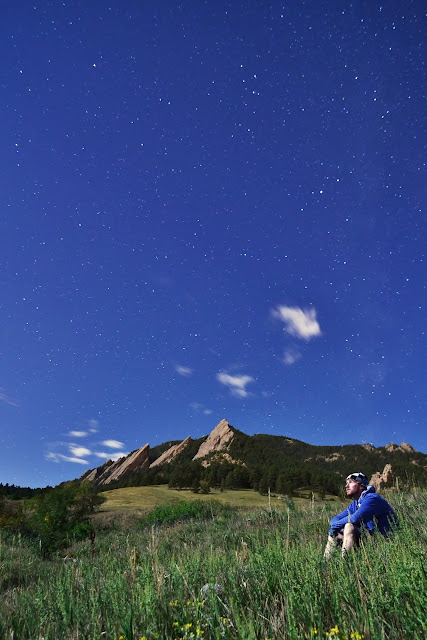
As with all night shots I highly recommend playing with White Balance on your camera. White balance on a night sky can turn the stars and the moon into anything from fiery apocalyptic scene of doom, to cool dark blues where stars look like little bits of ice up in the sky. Get creative with your scene and try out different flavors of White Balance. Right around 4000k to 5000k will give you a deep purple night sky and is usually a favorite go-to setting of mine for shooting at night.
The above and below image were both shot around that temperature White Balance
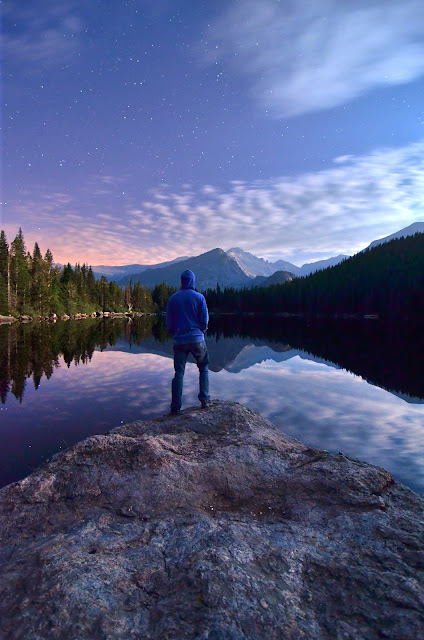
Put people in your shot! It might be my personal opinion, but there are times when you are given a vast beautiful landscape, and a strategically placed human presence in the photo adds so much more impact to the photo and that landscape. It turns a scene from night time landscape into more of a mystic scene out of a sci-fi movie... it has a character in it now, a character that people can relate themselves to. It gives people looking at your photo a way to imagine themselves being there in the image. If there is no one around to stay up late with you while you shoot all night long... then set a timer or get an IR remote shutter release and hop in the shot yourself! Be your own subject. Mark where in the shot you want yourself...set the timer... and QUICKLY RUN OVER AND JUMP IN!!! It's fun! It adds a challenge, and it makes for a super creative and unique photograph. (and a brand spankin new facebook profile pic)
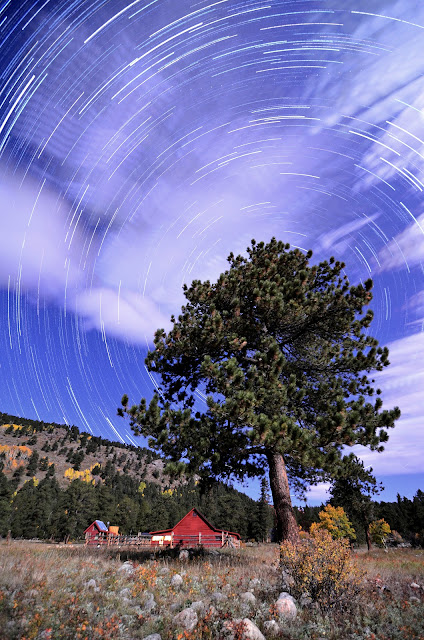
Star Trails!!
These shots take a lot of patience and a lot of time but are incredibly rewarding!
Set up at your location - Choose your subject, and shoot photo after photo of that same scene for as long as you like... I typically shoot for up to an hour and a half at a time when I do star trails!
After you have sat through your hour of photographing - Take the hundred or so shots you have just compiled and stack them! A good free startrail stacker can be downloaded for free here http://startrails.de/


Making use of Long Exposures
As with any long exposure shot it allows you a chance to light paint. Now you can light paint in the most literal sense by grabbing a flashlight and dancing around in the scene, creating a swirl of lights that look as if you had a paint brush of light to paint your photo. You can also use it to light up objects in the foreground such as trees or animals or people that need a little more emphasis as a subject. OR you can use already moving lights such as cars, or airplanes or even meteors to create light movement in your photo.
The below shot is a 25 second exposure of a car driving down trail ridge road.

Anyway - That is about all I have on shooting under the full moon. But it's starting to get dark out now so I think I am going to head off and do exactly that!! I hope you can take the tips from this blog and do the same every full moon!!!
Feel free to take a look at all of my night time photos at
Goodluck!! I look forward to seeing and hearing about your shots.